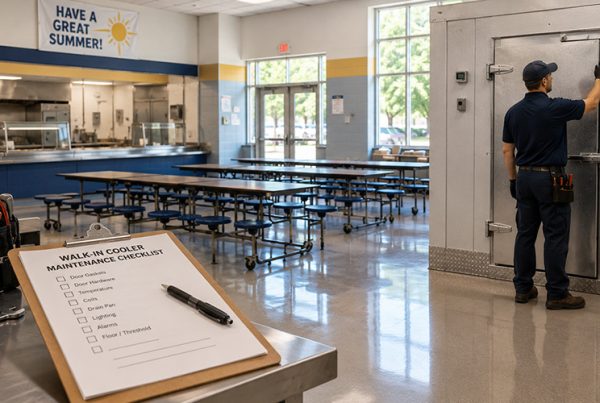

Walk-in coolers and freezers are built to work hard—but the parts that take daily wear (doors, gaskets, heaters, hardware, drains) eventually need attention. The question most owners and facility teams run into isn’t if something will need fixing… it’s this:
“Can we handle this ourselves, or do we need to call a technician?”
The good news: there are plenty of walk-in fixes that are absolutely DIY-friendly, especially when you’re working with straightforward door parts and common wear items. But there are also situations where the safest, smartest option is bringing in a professional—because the risk (or cost of getting it wrong) is too high.
This guide breaks it down clearly, with examples you can use in the field, plus DIY resources from ReFridge to help you handle the right repairs with confidence.
The Real Rule: DIY is Great When You’re Replacing Parts—Not Diagnosing Systems
A simple way to think about it:
✅ DIY works best when you already know what’s worn out (gasket, closer, sweep, latch, heater wire, etc.)
⚠️ Call a pro when you’re troubleshooting a system problem (temperature issues, refrigeration components, electrical faults, recurring ice)
Replacing a worn part is usually straightforward. Diagnosing a refrigeration or electrical issue can turn into guesswork fast—and guesswork is where things get expensive.

DIY-Friendly Walk-In Repairs (Most Teams Can Handle These)
These are the repairs that many facility teams, restaurant operators, and maintenance staff can tackle safely with basic tools.
1) Door Gaskets
If your door is leaking air, sweating, or building frost at the edges, a worn gasket is often the culprit.
Signs it’s time:
- cracks, tears, or stiffness
- corners pulling away
- visible gaps
- door closes but doesn’t feel “tight”
Why it’s a great DIY:
Gaskets are designed as replaceable wear parts, and swapping them is usually straightforward once you have the right size and style.
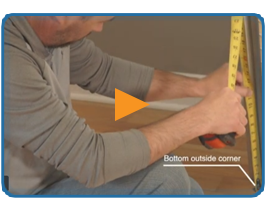
➡️ ReFridge DIY help: How to Measure Your Walk-In Door Gasket the Right Way
2) Strip Curtains
If your walk-in gets opened constantly, strip curtains are one of the cheapest “upgrades” you can make.
Great for:
- busy kitchens
- grocery and c-store back rooms
- high-traffic cooler and freezer doors
- staging areas with lots of door-open time
Why it’s DIY-friendly:
Typically a simple install that can reduce moisture intrusion and reduce recovery strain.
➡️ ReFridge DIY help: Strip Curtains: The Cheapest Way to Cut Energy Loss in a Busy Walk-In
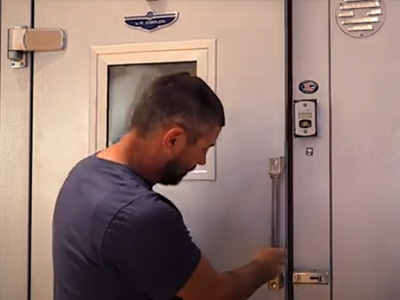
3) Door Closers
Door closers fail slowly—and teams often don’t notice until the door starts staying cracked open.
Signs of trouble:
- door doesn’t shut fully every time
- door slams hard
- door closes too slowly
- staff has to “help” the door close
Why it’s DIY-friendly:
Most closer swaps are clean hardware replacements, and it’s one of the most effective fixes for temperature stability.
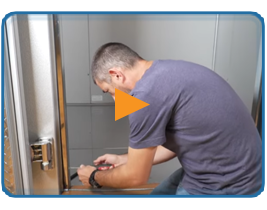
4) Latches, Handles, and Strikes
If the door “closes” but doesn’t seal tight, the latch may not be pulling the door snug against the gasket.
Symptoms:
- door feels loose when latched
- you can push the door tighter even after it’s shut
- handle doesn’t engage smoothly
- repeated frosting or sweating near one edge
Why it’s DIY-friendly:
These are mechanical parts, and the repair is often straightforward once you match the correct hardware.
5) Sweeps and Threshold Seals
Most air leaks and icing start at floor level. A worn sweep can create a gap that pulls in warm air and humidity.
Look for:
- visible gap under the door
- recurring moisture at the entrance
- ice at the threshold (freezers)
Why it’s DIY-friendly:
Swapping sweeps and seals is typically a quick hardware job with high ROI.
6) Door Heater Wire (Freezers)
On freezer doors, heater wire helps prevent frost/ice around the frame and sealing surface.
Symptoms of failure:
- ice building up around the frame
- door sticking
- gasket icing at one section more than others
DIY note:
Some heater wire replacement is DIY-friendly for experienced maintenance teams, but if wiring access is complex or you’re unsure, this can be a pro call.
➡️ ReFridge DIY help: Door Heater Wire: What It Does, Why It Matters, and When to Replace It
7) Basic Cleaning + Prevention Tasks
These aren’t “repairs,” but they prevent many expensive calls.
DIY prevention checklist:
- keep door sealing surfaces clean
- remove ice buildup early
- keep airflow clear inside the walk-in
- avoid propping doors open during stocking
- replace worn parts before the walk-in struggles
⚠️ When You Should Call a Professional (and Why)
Some walk-in problems look simple at first—but they’re connected to refrigeration performance, electrical safety, or code compliance. These are the situations where calling a pro saves money and prevents damage.
1) Temperature Problems You Can’t Explain
If your walk-in can’t hold temperature, don’t guess.
Call a pro if:
- product temps are rising
- unit runs constantly
- temps fluctuate throughout the day
- the box is warm even after reducing traffic
These issues can be caused by refrigerant charge, compressor problems, electrical faults, evaporator issues, airflow problems, or controls.
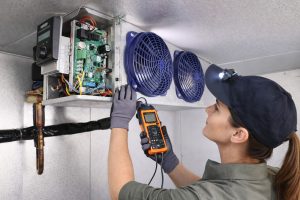
2) Electrical Issues
If it involves power troubleshooting, wiring faults, or breaker trips—bring in a qualified technician.
Call a pro if:
- breakers trip repeatedly
- controls are acting erratically
- lights or heaters cut in and out
- you smell electrical burning or see damaged wiring
Electrical issues can escalate quickly, and they’re not worth the risk.
3) Refrigeration System Repairs or Refrigerant Handling
Anything involving the sealed refrigeration circuit should be handled by a licensed professional.
That includes:
- refrigerant leaks
- compressor replacement
- condenser/evaporator motor issues
- pressure or charge problems
- major defrost failures
4) Recurring Frost, Ice, or Water That Keeps Coming Back
A one-time ice issue might be traffic or a door leak.
But recurring problems often signal a deeper cause:
- defrost system issues
- drain line problems
- airflow and humidity imbalance
- door heater circuit issues
- poor sealing + heavy traffic patterns
If you keep fixing the symptom and it returns, a pro diagnosis is usually the fastest solution.

➡️ ReFridge DIY help (early detection):
Walk-In Freezer Drain Line Frozen? Here’s How to Spot It Before It Floods
Frost on the Floor or Ice at the Door? Here’s What It Usually Means
Your Walk-In Door Closes… But Still Leaks Air. Here’s Why.
5) Anything That Impacts Food Safety Compliance
If you operate in foodservice, grocery, or regulated storage, temperature stability isn’t optional.
Call a pro if:
- the walk-in is close to unsafe temps
- alarms are triggering
- you have product loss risk
- a fix needs to be immediate and verified
The “Smart DIY” Approach: Do the Easy Wins First
If you’re trying to decide what to do, start here:
Step 1: Check the door first
Most performance issues begin with door sealing and door-open habits:
- gasket condition
- latch tightness
- closer performance
- sweep/threshold gaps
Step 2: Look for airflow blockage
Overloading and blocked airflow create hot spots and recovery issues.
Step 3: Watch for repeat patterns
If the same issue happens repeatedly (ice, water, frost), it usually needs deeper troubleshooting.
ReFridge DIY Resources to Help You Fix the Right Problems
If you want to save time, money, and downtime, start with our step-by-step DIY resources:
- How to Measure Your Walk-In Door Gasket the Right Way (So You Don’t Waste Time & Money)
- Strip Curtains: The Cheapest Way to Cut Energy Loss in a Busy Walk-In
- Door Heater Wire: What It Does, Why It Matters, and When to Replace It
- Walk-In Freezer Drain Line Frozen? Here’s How to Spot It Before It Floods
- Frost on the Floor or Ice at the Door? Here’s What It Usually Means
- Your Walk-In Door Closes… But Still Leaks Air. Here’s Why.
These guides are designed to help you diagnose common symptoms, identify failing parts early, and handle the DIY repairs that make the biggest difference.
Final Takeaway: DIY Saves Money—Pro Help Saves You From Expensive Mistakes
DIY walk-in repairs are a smart move when you’re replacing common wear parts:
✅ gaskets
✅ closers
✅ latches
✅ sweeps
✅ strip curtains
✅ some heater wire situations
But when the problem involves temperature control, electrical troubleshooting, refrigeration systems, or recurring ice and moisture issues, calling a professional is usually the fastest and safest solution.
When in doubt, use this rule:
If it’s a part replacement—DIY it.
If it’s system diagnosis—call a pro.
And if you want help identifying the right parts, ReFridge has DIY resources to guide you step-by-step and help you get it right the first time.